ADVERTISEMENT
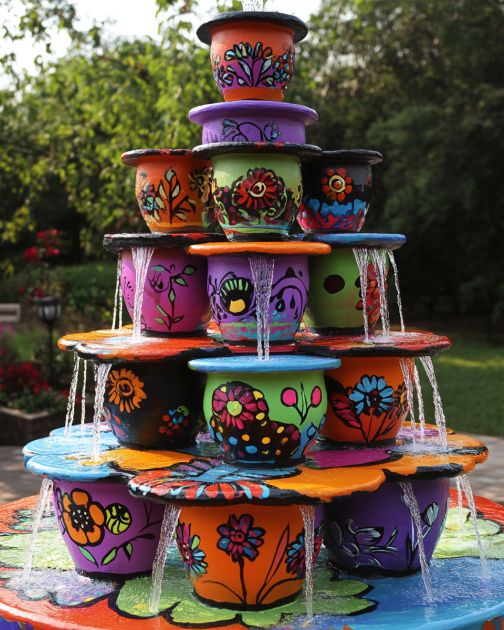
So creative!
Directions
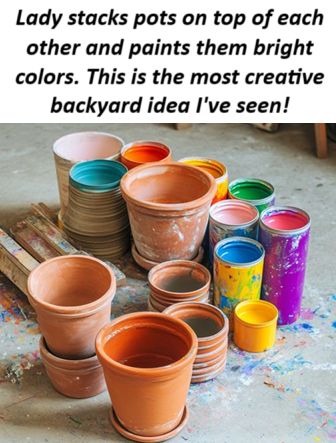
Start by sanding the terra cotta pots to ensure a smooth surface for painting.
Paint each pot in your chosen bright colors, allowing each coat to dry completely before applying another. You may need 2-3 coats for vibrant coverage.
Once the paint is dry, apply a clear outdoor sealant to protect the colors from weathering.
Using the drill and masonry bit, create a hole in the center of each pot’s base if not already present. This will allow the tubing to pass through.
Stack the pots upside down on top of each other, starting with the largest at the bottom. Use waterproof adhesive or silicone sealant to secure them in place.
Feed the plastic tubing through the holes, starting from the top pot down to the bottom, connecting it to the water pump.
Place the pump inside the bottom pot, ensuring it’s fully submerged in water.
Fill the bottom pot with water, plug in the pump, and adjust the flow rate as needed to achieve the desired fountain effect.
Variations & Tips
For a more personalized touch, consider painting patterns or designs on the pots, such as stripes, polka dots, or floral motifs. You can also experiment with different pot sizes and arrangements to create varying heights and shapes. If you prefer a more natural look, use earthy tones and add moss or small plants around the base of the fountain. Additionally, solar-powered water pumps are an eco-friendly alternative to traditional pumps, reducing energy consumption and allowing for more flexible placement in the garden.
For Complete Cooking STEPS Please Head On Over To Next Page Or Open button (>) and don’t forget to SHARE with your Facebook friends
ADVERTISEMENT
