ADVERTISEMENT

So clever! Have to do this!
Decide on a design or pattern for your lights on the canvas. You can create a simple starry night effect, a specific shape, or even spell out a word.
Use a pencil and ruler to lightly mark where each light will poke through the canvas. Ensure the marks are evenly spaced and aligned with your design.
Carefully drill small holes at each pencil mark. The holes should be just large enough for the lights to fit snugly through.
Insert the lights through the holes from the back of the canvas. Secure each light in place with a small dab of hot glue.
Arrange the remaining wire neatly on the back of the canvas, securing it with painter’s tape to keep it in place.
If using battery-operated lights, attach the battery pack to the back of the canvas using painter’s tape or hot glue. Ensure it is easily accessible for changing batteries.
Test the lights to ensure they all illuminate properly and make any necessary adjustments.
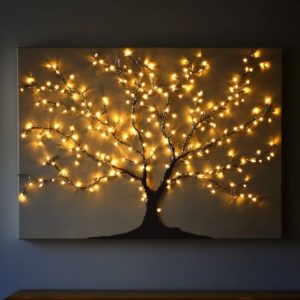
Hang or display your illuminated canvas in the desired location and enjoy the warm, inviting glow.
Final Look
Variations & Tips
For a more personalized touch, consider painting the canvas before adding the lights. You could paint a winter scene, abstract design, or even a favorite quote. Another variation is to use colored lights for a more festive look or to match your existing decor. If you prefer a more subtle effect, use a canvas with a pre-printed design and strategically place the lights to highlight certain features. Additionally, you can experiment with different sizes and shapes of canvases to create a gallery wall of illuminated art.
For Complete Cooking STEPS Please Head On Over To Next Page Or Open button (>) and don’t forget to SHARE with your Facebook friends
ADVERTISEMENT
