If you love old-world remedies with a gourmet twist, pine cone syrup is a gem. Made from young, green pine cones, this thick, amber syrup carries forest aromatics (hello, α-pinene and friends), a gentle resinous sweetness, and a long history in home kitchens for soothing throats and flavoring food. Below you’ll find a clear, step-by-step guide that any beginner can follow—plus benefits, storage tips, and lots of ways to use it.
What Is Pine Cone Syrup?
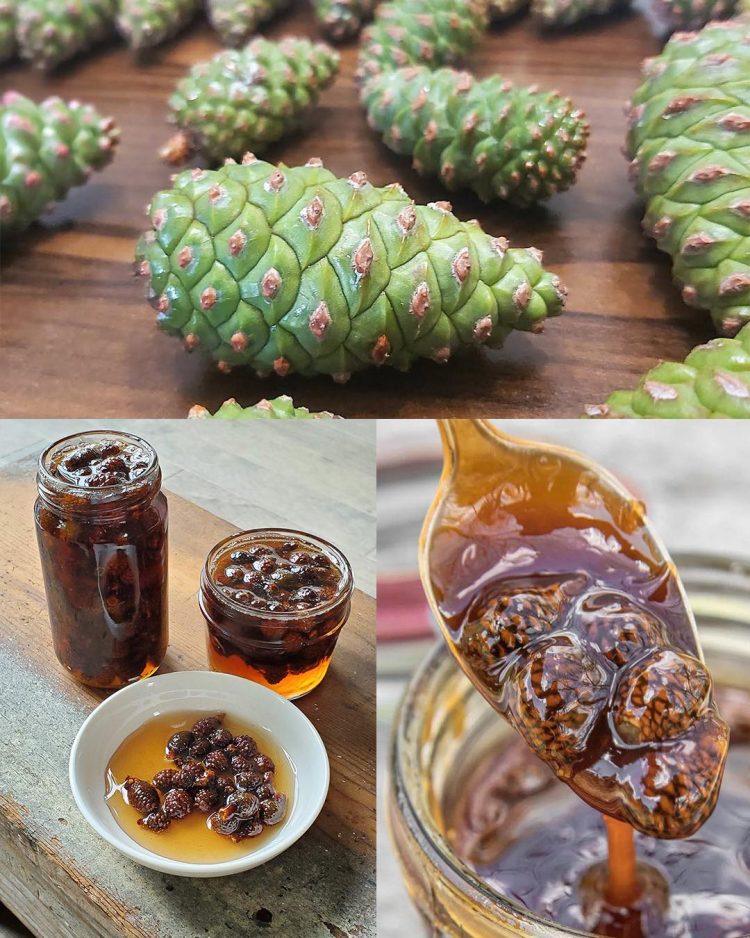
Pine cone syrup is a traditional, homemade syrup crafted from immature, soft pine cones (the kind you can slice with a knife or easily press with your fingers). The cones release fragrant compounds, mild bitterness, and natural color into sugar, creating a syrup that tastes like honey met the forest.
Important: Only use cones from true pines (genus Pinus). Do not confuse pine with yew (Taxus baccata, toxic) or with poison hemlock (a herbaceous plant, not a tree). If you’re unsure about identification, skip harvesting.
Potential Benefits (Traditional & Culinary)
Soothing for throat and cough
Traditionally sipped in warm water or tea to ease throat scratchiness and occasional cough.
Aromatics for easy breathing
Pine’s volatile compounds (like α-pinene) give that “clear the head” aroma many people love in steamy drinks.
Mild expectorant feel
Folk use suggests it can help loosen stubborn mucus when taken warm (e.g., stirred into hot water).
Comforting warm-up
A spoon in hot water or milk makes a calming, cozy nightcap.
Gentle digestive lift
The light bitterness can be helpful after heavy meals (taken in small amounts).
Mood & ritual
The foresty scent and slow ritual of making/using it can be grounding and pleasant.
Culinary superpower
A unique sweetener for desserts, glazes, salad dressings, cocktails, coffee, and tea.
Antioxidant notes
Pine plant parts contain polyphenols and vitamin C; your syrup won’t be a vitamin pill, but it does carry some plant goodness.
Not medical advice: Pine cone syrup is a kitchen remedy and specialty sweetener. For ongoing symptoms or medical conditions, talk to a healthcare professional.
What You’ll Need
Ingredients (Stovetop Method – fast):
500 g young green pine cones (soft, 1–3 cm; picked in late spring/early summer)
700 g white sugar (you can blend white + light brown for deeper flavor)
500 ml water
Optional: 1 lemon (sliced) or 1–2 tsp lemon juice (helps balance sweetness); 1 small piece vanilla bean or cinnamon stick for aroma
Gear:
Large bowl, colander, cutting board, knife
Non-reactive pot (stainless steel or enamel)
Spoon, fine strainer/cheesecloth
Clean, sterilized bottles or jars with lids
Kitchen scale (highly recommended)
How to Harvest & Prep Cones
Choose the right cones:
Look for immature, green, soft cones you can cut through. Hard, brown, woody cones are past their prime for syrup.
Ethical picking:
Take a modest amount from multiple trees. Avoid protected areas. Get permission if needed.
Clean carefully:
Shake off insects/debris. Rinse briefly in cool water; pat dry. Don’t soak for long—aroma lives in the resin.
Method 1: Quick Stovetop Syrup (Ready the Same Day)
This is the easiest way for beginners.
Cut or halve the cones (optional):
If they’re small and very soft, leave whole. Otherwise, halving exposes more surface and speeds extraction.
Simmer the cones:
Add cones and 500 ml water to the pot. Bring to a gentle simmer (not a roaring boil) for 30–40 minutes, partially covered.
Aim to soften the cones and perfume the water; it should turn golden to amber.
Strain the pine “tea”:
Remove from heat. Strain through a fine sieve or cheesecloth to get a clear, fragrant liquid. Discard cones.
Make the syrup:
Return the liquid to the pot, add 700 g sugar (and lemon slices or juice if using). Stir to dissolve over low heat.
Simmer 10–15 minutes, skimming foam. If you have a thermometer, heat to 103–105 °C (syrup stage).
The syrup will thicken a bit more as it cools.
Bottle safely:
see continuation on next page
