Planting the Cutting
After preparing the cutting, place it in the soil mixture containing perlite. Position the cutting correctly so that the buds face upwards. Water it generously to provide sufficient moisture for root development. Perlite will absorb some of the moisture, allowing for gradual release, but it is still essential to monitor soil hydration regularly. While using a rooting hormone is an option, hydrangeas generally root well on their own, making this step unnecessary.
Keep the planted cutting in a shaded area, avoiding direct sunlight, which can dry out the soil too quickly and hinder root development. If you anticipate significant temperature fluctuations between day and night, consider covering the cutting with a plastic bottle or bag to create a mini greenhouse effect. This will help maintain a stable microclimate and encourage root growth.
Water Propagation Method
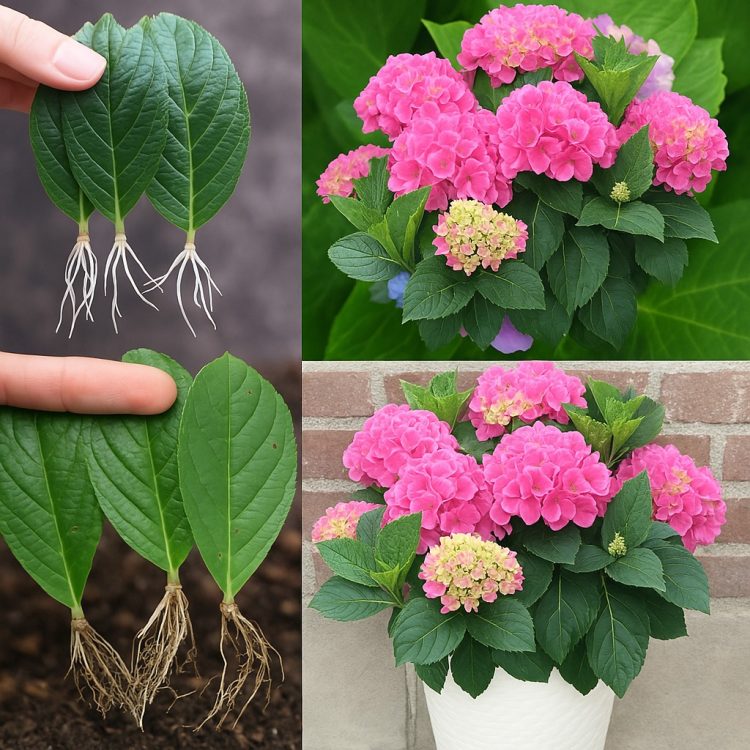
Another simple propagation technique involves placing hydrangea cuttings in water. Similar to soil propagation, select a young, green cutting and remove most of the leaves, leaving only two small ones. Trimming the remaining leaves ensures that the plant focuses its energy on root formation rather than leaf growth. Keep the cutting in water and place it in a shaded area until roots develop. This method allows for easy observation of root formation before transplanting the cutting into soil.
Layering Method for Propagation
For gardeners who already have mature hydrangeas growing in their gardens, another effective propagation method is layering. Select a flexible branch that is close to the ground and partially shaded during the day. Dig a small hole and loosen the soil in preparation for burying the branch. Remove the leaves from the portion of the branch that will be underground, then bend the branch into the hole and cover it with soil. This technique, known as layering, encourages root development at the buried section of the branch.
To ensure that the branch stays in place, use stones or small stakes to hold it down. Maintain consistent moisture in the soil to support root formation. By the following spring or late summer, check if the branch has developed roots. Once it has, gently separate the new seedling from the parent plant and transplant it either into a pot with prepared soil containing perlite or directly into the garden.
Caring for Young Hydrangeas
Regardless of the propagation method used, proper care is essential for young hydrangeas. Keep the soil consistently moist but not waterlogged. Maintain adequate shade to prevent excessive drying and provide a favorable environment for root development. Once the cuttings or layered branches establish strong roots, they can be transplanted into a permanent location in your garden.
Conclusion
Propagating hydrangeas is a straightforward process that requires minimal effort but a bit of patience. Whether you choose to propagate via cuttings in soil, cuttings in water, or layering, these methods allow you to expand your hydrangea collection and beautify your garden with these stunning plants. With the right care, your new hydrangeas will thrive, rewarding you with lush foliage and spectacular blooms year after year.
