6. Create a Humid Environment
Mist the cutting lightly with water using a spray bottle.
Cover the pot with a clear plastic bag or place it under a humidity dome to retain moisture.
Ensure the plastic does not touch the leaves; use stakes if necessary.
7. Place in the Right Location
Keep the pot in a warm, bright spot with indirect sunlight. Avoid placing it in direct sunlight, as this can scorch the cutting.
The ideal temperature for rooting is between 65°F and 75°F (18°C – 24°C).
8. Monitor and Care for the Cutting
Check the cutting daily to ensure the soil remains moist but not waterlogged.
Remove the plastic bag or dome for a few minutes each day to prevent mold and mildew.
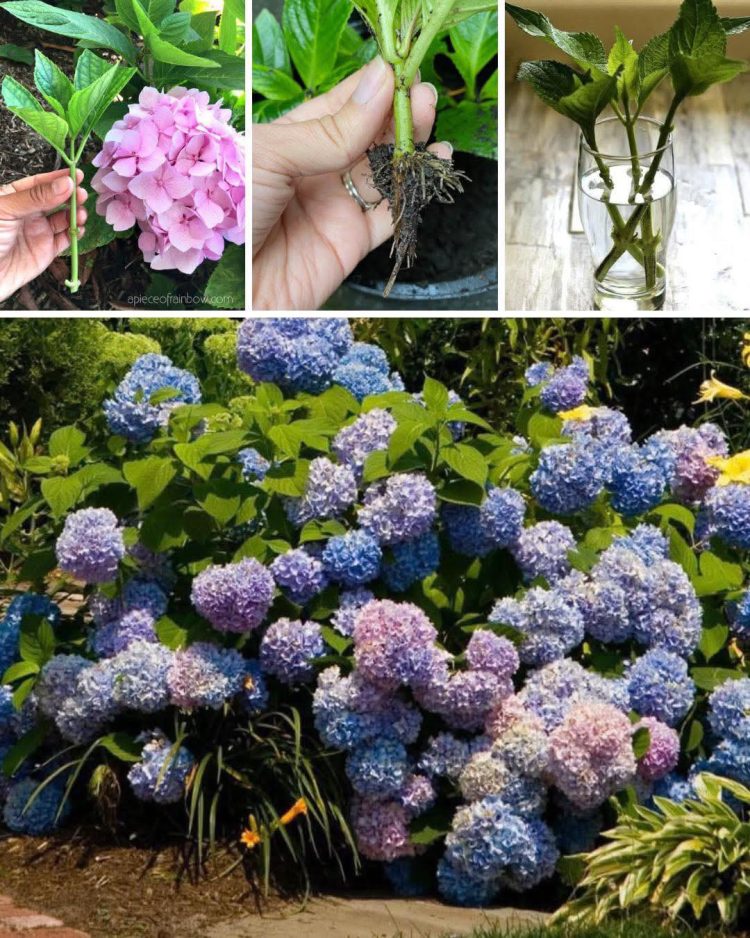
After 2-4 weeks, gently tug on the cutting to check for resistance, which indicates root development.
Transplanting Rooted Hydrangea Cuttings
Once the cutting has developed a strong root system, it’s time to transplant it to a larger pot or directly into your garden.
Steps to Transplant:
Choose the Right Spot: Hydrangeas prefer well-draining soil and partial to full shade, depending on the variety.
Prepare the Soil: Enrich the planting area with compost or organic matter to boost soil fertility.
Transplant with Care: Dig a hole large enough to accommodate the roots and plant the cutting at the same depth it was in the pot.
Water Thoroughly: Water the transplanted cutting immediately to help it settle into its new environment.
Tips for Success
Use Fresh Cuttings: Take cuttings early in the day when the plant is well-hydrated.
Avoid Overwatering: Too much water can lead to root rot. Keep the soil moist but not soggy.
Be Patient: Rooting can take several weeks. Don’t rush the process.
Protect from Frost: If transplanting outdoors, ensure the young plant is protected from frost and extreme weather.
Label Your Cuttings: If propagating multiple varieties, label each pot to keep track of your plants.
Common Problems and Solutions
1. Wilting Leaves:
Cause: Too much sun or inadequate humidity.
Solution: Move the cutting to a shaded area and mist it more frequently.
2. Mold or Mildew:
Cause: Excess moisture and poor air circulation.
Solution: Remove the plastic bag temporarily and ensure proper ventilation.
3. No Root Development:
Cause: Cutting was too old or not treated with rooting hormone.
Solution: Start with fresh cuttings and consider using rooting hormone.
Growing hydrangeas from cuttings is a simple and rewarding process that allows you to multiply your favorite plants and create a lush, colorful garden.
Here are some ideas for outdoor home decorating with hydrangeas:
