2. Test the IR Signal Using Your Smartphone
Still not working with new batteries? The infrared transmitter may be the issue.
How to test:
Open your phone’s camera app.
Aim the remote’s IR sensor at the camera.
Press any button and watch for a flashing light on the screen.
If no light appears: The transmitter might be defective.
Tip:
Clean the IR sensor with a microfiber cloth and ensure nothing blocks its path to the TV.
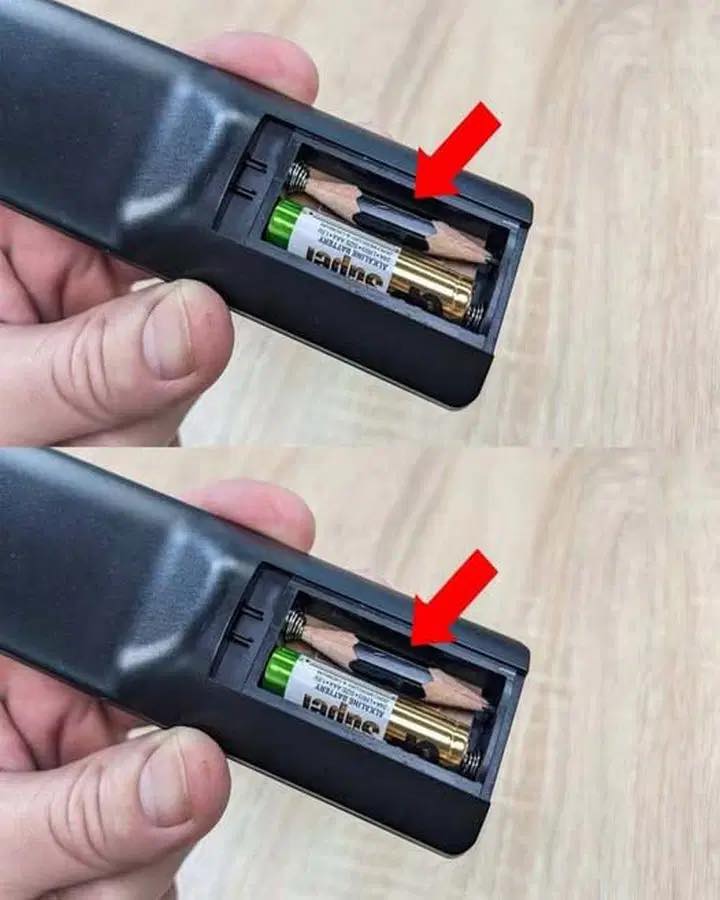
3. Create a DIY Emergency Battery
Need a quick battery fix?
Materials Needed:
A pencil, tweezers, a sharpener, and a spent battery.
Steps:
Cut a pencil piece to match the battery size.
Flatten the ends and attach a metal contact (from the old battery) to one side.
Pair it with a working battery in the remote and test.
Note: This is a temporary fix until you can replace it with proper batteries.
4. Revive Weak Batteries Temporarily
Running low on battery power? Try this trick:
Instructions:
Remove the batteries and rub their ends with aluminum foil.
Warm them in your hands briefly to stimulate the chemicals.
Reinsert and test again.
Note: This is a short-term hack, not a permanent solution.
5. Clean the Inside of the Remote
If buttons are sticky or unresponsive, dirt may be the issue.
Cleaning process:
Carefully open the remote using a small tool.
Remove debris or dust near contacts.
Mix demineralized water and vinegar, then clean circuit boards with a cotton swab.
Let it fully dry before reassembling.
Optional: Use compressed air to clean without opening the case.
6. Inspect Internal Components
If all else fails, it might be a hardware issue.
see continuation on next page
